Dec . 07, 2024 09:43 Back to list
thrust ball bearing mounting
Thrust Ball Bearing Mounting An Essential Guide
Thrust ball bearings are a type of rolling-element bearing designed to handle axial loads while allowing for a limited degree of radial misalignment. These bearings are crucial in various applications ranging from automotive components to industrial machinery. Proper mounting of thrust ball bearings is essential to ensure efficient operation, reliability, and longevity. In this article, we will explore the importance of correctly mounting thrust ball bearings, the tools required, and the steps involved in the process.
Understanding Thrust Ball Bearings
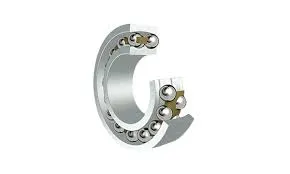
Thrust ball bearings consist of two grooved rings, with balls positioned between them. They are designed specifically to accommodate axial loads, which are forces that act parallel to the shaft. Thrust ball bearings come in different types, including single direction and double direction, depending on the application. Understanding the specific type of bearing needed for your application is crucial before proceeding with mounting.
Importance of Proper Mounting
The correct installation of thrust ball bearings is vital for several reasons. Poor mounting can lead to premature failure due to excessive wear or improper load distribution. Additionally, misalignment can cause noise, vibration, and overheating, which can damage the surrounding components. Therefore, attention to detail during the mounting process can significantly enhance the overall performance and lifespan of machinery.
Tools Required
Before beginning the mounting process, it's important to gather the necessary tools 1. Micrometer For measuring shaft and housing dimensions. 2. Caliper To check clearances and fits. 3. Torque Wrench To apply the correct amount of torque during installation. 4. Non-metallic hammer To avoid damaging the bearing. 5. Bearing grease For lubrication, which is essential for reducing friction. 6. Cleaning materials To prepare the mounting surfaces.
Step-by-Step Mounting Process
thrust ball bearing mounting

1. Preparation of Surfaces Ensure that both the shaft and housing are clean and free of debris. Any contamination can lead to failure of the bearing, so take the time to clean the surfaces thoroughly.
2. Measurement Check Use a micrometer or caliper to measure the dimensions of the shaft and housing. Ensure that they conform to the specifications provided by the manufacturer of the bearing.
3. Greasing Apply an appropriate amount of bearing grease to the raceways of the thrust ball bearing. This lubricates the surfaces and facilitates smoother operation. Avoid over-greasing, as it can cause the bearing to run hot.
4. Positioning the Bearing Carefully place the bearing onto the shaft, ensuring that it is aligned correctly. If a housing is involved, guide the bearing into the housing carefully without applying excessive force.
5. Using a Non-metallic Hammer If the bearing is tight, gently tap it into place using a non-metallic hammer. Avoid using metal tools, which can damage the bearing.
6. Securing the Bearing Once positioned, securely fasten the bearing using the appropriate fasteners if required. Use a torque wrench to ensure that the correct torque is applied to prevent loosening during operation.
7. Final Checks After mounting, perform a final inspection to check for any misalignment or excessive play. Rotate the shaft to ensure that the bearing moves freely without any obstruction or binding.
Conclusion
Proper mounting of thrust ball bearings is a fundamental aspect of mechanical assembly that cannot be overlooked. By following the outlined steps and using the right tools, you can ensure that your thrust ball bearings function optimally, enhancing the performance and reliability of your machinery. Remember, attention to detail during installation will pay dividends in terms of maintenance and extended service life. Investing time in the correct mounting process will lead to greater efficiency and reduced operational costs, making it a worthwhile endeavor for any technician or engineer.
Latest news
-
Premium Deep Groove Ball Bearings | High Speed & Reliability
NewsAug.29,2025
-
Durable Scaffolding Clamps - Secure & Reliable Tube Connectors
NewsAug.28,2025
-
Common Failures in Thrust Ball Bearings and Solutions
NewsAug.22,2025
-
How Tapered Roller Bearings Can Take Shock Loads
NewsAug.22,2025
-
Angular Bearings in High-Precision Spindles
NewsAug.22,2025
-
The Impact of Misalignment on Cylindrical Roller Bearing Performance
NewsAug.22,2025
