11-р сар . 17, 2024 07:48 Back to list
Guide to Installing Angular Contact Ball Bearings Effectively and Safely
Installing Angular Contact Ball Bearings A Comprehensive Guide
Angular contact ball bearings are specifically designed to accommodate axial loads in one direction, making them crucial in applications such as high-speed motors, gearboxes, and precision machining tools. Correct installation is essential for ensuring optimal performance, longevity, and reliability. This article provides a step-by-step guide on how to properly install angular contact ball bearings.
Step 1 Preparation
Before starting the installation process, it’s important to gather all necessary tools and materials. You will need - Angular contact ball bearings - Clean cloth or lint-free wipes - Appropriate grease or lubricant - Bearing installation tools, such as a bearing press or protective sleeves - Calipers for measurement
Ensure that the work area is clean and free of contaminants. Any dust or debris can lead to premature bearing failure.
Step 2 Inspecting the Components
Before installation, inspect the bearings and the components in which they will be housed. Look for any signs of damage, such as pits on the raceways, corrosion, or misalignment. Measure the shaft and housing to verify that they conform to the specification recommended by the manufacturer.
Step 3 Pre-lubrication
Angular contact ball bearings typically require lubrication before installation. Depending on the application, you can use grease or oil - For grease, apply it evenly along the rolling elements and raceways. - For oil, immerse the bearings for a few seconds to ensure complete saturation.
Proper lubrication helps reduce friction, wear, and overheating during operation.
Step 4 Proper Orientation
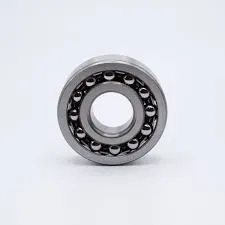
angular contact ball bearing installation

Angular contact bearings must be installed with the correct orientation since they are designed to handle axial loads in a specific direction. Review the bearing's mark or designation to ensure proper alignment. Generally, the outer ring should be seated in the housing, while the inner ring is placed on the shaft.
Step 5 Installation Process
1. Use of Protective Sleeves When pressing the inner ring onto the shaft, use protective sleeves to avoid applying force directly on the rolling elements. This helps prevent damage to the bearing.
2. Pressing the Bearing Use a bearing press to gradually apply even pressure when installing the bearing onto the shaft or within the housing. Avoid excessive force to prevent deformation.
3. Check for Free Movement Once installed, ensure that the bearing rotates freely without binding. There should be no noticeable play or misalignment between the bearing and the housing.
Step 6 Final Assembly
After successfully installing the angular contact ball bearings, proceed with the assembly of the rest of the components. Ensure all fasteners are tightened to the manufacturer's specifications to prevent loosening during operation.
Step 7 Testing
Once the assembly is complete, conduct a test run to verify the operation of the unit. Listen for unusual noises and monitor temperatures to ensure everything is functioning correctly.
Conclusion
Correct installation of angular contact ball bearings is vital for the success of any machinery or application involving these components. By following these steps, you can ensure a successful installation that maximizes bearing performance and extends service life. Always refer to the manufacturer’s guidelines for specific recommendations regarding your particular application.
Latest news
-
Grooved Ball Bearing Design and Functionality
NewsJun.04,2025
-
Concrete Mixer Bearing Load Capacity Testing
NewsJun.04,2025
-
6004 Bearing Dimensions in Robotic Joint Designs
NewsJun.04,2025
-
Advantages of Single-Row Deep Groove Ball Bearings
NewsJun.04,2025
-
Applications of Deep Groove Ball Bearings in Automotive Systems
NewsJun.04,2025
-
Innovations in Bearing Pressing Machine Design
NewsJun.04,2025
